How do You Cut Down a Big Tree?

If you have a big tree that is dying, or that is posing a danger to your home, often the best decision is to cut it down. This task should only be tackled if you are comfortable with a chainsaw, and willing to follow a few different safety precautions. If you’re looking to cut down a tree, here are nine steps you should follow to do it safely and correctly.

  1. Decide if it’s Safe

While cutting down small trees is often a quick and easy process, cutting down larger ones is a pretty big job. If the tree has a lot of broken or dead branches, or if it has an undiagnosed disease, it is best to call an expert for help. Dead or loose branches can fall on you while you are working, and some diseases can be spread if you aren’t careful. Walk around your tree to check for these issues. While you’re at it, check to make sure you aren’t at risk of knocking down any power lines or hitting any buildings. If these obstacles are in your way, it is going to be safer to call in an arborist to deal with the tree for you in a safe way.
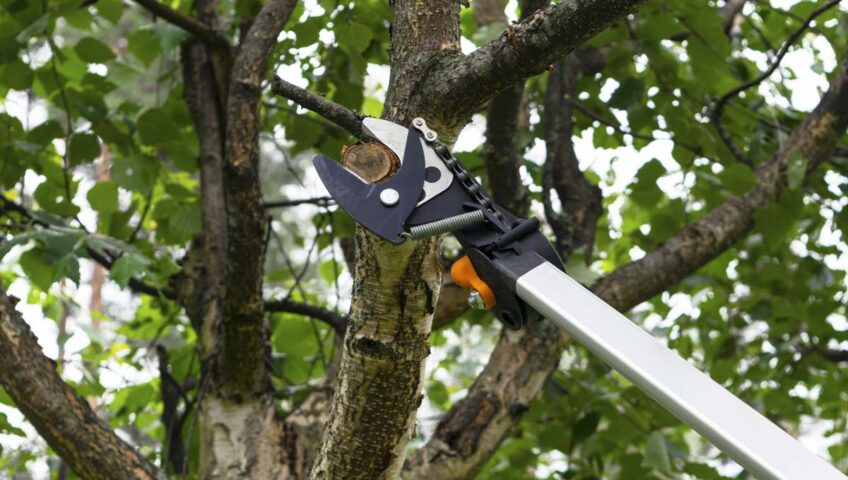
  1. Gather Equipment

As with all DIY jobs, making sure that you have the right safety gear should be the first task on your list. Here is what you will need to cut down a tree:

  • Hard hat
  • Safety glasses
  • Hearing protection
  • Work gloves
  • Chainsaw
  • Felling wedges

Another good safety idea is to have a friend or family member on hand to help. A second set of eyes can alert you if anything is going wrong, or if something or someone comes too close to the tree while you are working on cutting it down.

  1. Estimate the Fall

Before you start cutting, you need to figure out where the tree is going to fall. If it has more branches on one side than another, it will fall that way regardless of how you cut it. You will also need to estimate how tall the tree is so you can be sure there is enough room for it to fall. One trick to estimate this is to hold an ax at arm’s length, close one eye, then walk away from the tree. When the top and bottom of the ax are lined up with the top and bottom of the tree, you are standing about where the top of the tree will be when it falls.

  1. Plan Escape Routes

Having at least two escape routes planned in advance will ensure that you have a clear path to get away if anything goes wrong. Make sure the routes are clear of debris, and will take you far enough away that, if the tree falls where you don’t want it to, you aren’t at risk of getting hit by it.
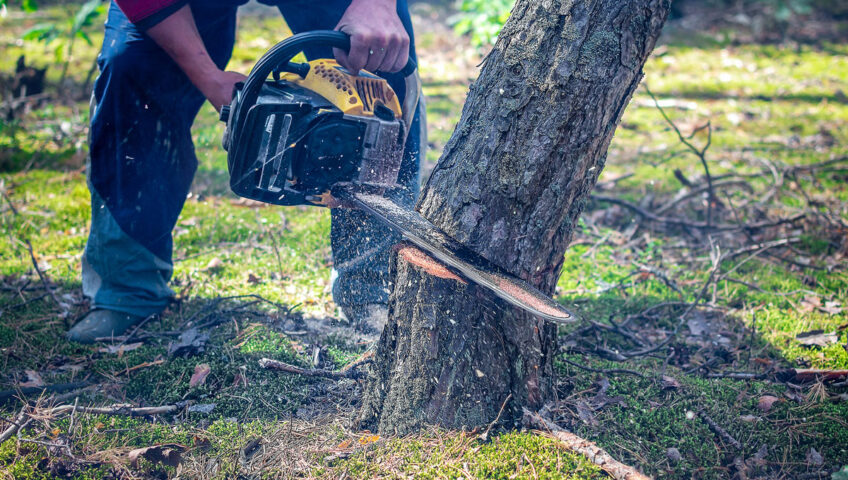
  1. Plan the Notch

The notch is what will determine which direction the tree falls in. The notch needs to be on the “fall side” of the tree, which should also be the heaviest side of the tree. Make sure to plan the notch at a comfortable working height, so you aren’t having to bend over too far. The stump can always be cut down closer to the ground, or removed entirely, once the tree is gone.

  1. Cut the Notch

Start with the top cut of the notch, moving at about a 45 degree downward angle. Cut about ⅓ of the way into the trunk. Then, make a second cut below the first parallel to the ground. This cut should meet, or come pretty close to meeting, the first cut.

  1. Insert Wedges

If the tree’s trunk is more than 18 inches in diameter, you will need to use felling wedges. These handy plastic devices help prevent your saw from becoming trapped in the tree while you are cutting. These wedges need to go into the bottom cut as soon as you’ve cut deep enough to get them inserted. Stop cutting, pound them in with a hammer, and then complete the cut.

  1. Make the Felling Cut

This is the cut that will make the tree fall. You will make this cut on the opposite side of the tree from the notch. Start the cut about an inch above the notch, keeping the chainsaw parallel to the ground. Go slowly, as you do not want to cut all of the way through. Once the tree starts to fall, stop cutting and walk one of your escape routes to get out of the way.

  1. Remove Branches and Cut into Firewood

Once the tree is down, the next step will be removing all of the branches from the trunk. After that, cut the tree truck into more manageable pieces for removal. You can either keep the tree for firewood, or call your city to ask about proper disposal options.

When in Doubt, Get Expert Tree-Cutting Help

While cutting down a tree may seem like no big deal, it can in fact pose a risk to your property. From trees that fall where you don’t want them to, to trees that are taller than the area they have to fall in, there are many issues that can arise when you take down a tree. When in doubt, it is always best to call on a professional for help. Our licenced arborists have years of training with all types of tree services, and can help by taking down your tree in the safest, most efficient way. Give us a call anytime for a free consultation.

Best Time of Year to Trim a Tree

No homeowner wants huge, wildly overgrown trees in their yard. They are unsightly and can even pose a danger to your home and vehicles, which is why tree trimming is the most common form of tree maintenance. Yet many homeowners are unsure of when is the best time of year to trim a tree, especially when advice from neighbors comes in well-meant but vague old adages like “Trees should be trimmed when the saw is sharp.” There is a best time and a worst time to trim a tree, and there is also a proper way to do it. Read on for some tree trimming facts to help you know how and when to trim your trees.

Why Trim a Tree

There are many reasons to keep your trees properly trimmed. Trimming helps maintain good tree health by removing damaged or diseased growth. It also increases safety by removing low-hanging branches that can inhibit pedestrians or block sight at the end of a driveway, as well as remove branches that hang over buildings and near electrical lines. Trimming can also help to increase the amount of air and light that penetrates to the inside of the tree, and to any landscaping below. Trees are also pruned for aesthetic reasons, to improve their looks or limit their growth. Homeowners can prune small trees themselves, using loppers and handsaws. Large trees, or any trees growing near electrical lines, should instead be pruned by professionals.

Best Trimming Time

Many homeowners don’t really know when to trim their trees to prevent problems. The best time to trim most trees is in late fall and throughout the winter months, while the tree is in dormancy. Trimming while a tree is dormant helps to minimize the risk of fungal infections, as the cut will heal quickly when trees being their vigorous growth in early spring. This is also the best time to trim evergreen trees, as spring growth will quickly cover signs of heavy or extensive trimming.

A few types of trees, such as magnolia trees, flower on wood grown during the previous year. Trimming at the wrong time can easily remove all the dormant buds, resulting in a non-flowering tree for the year. Any type of tree or shrub that bloom on old growth should not be trimmed in the fall, but instead just after they flower.

Worst Trimming Time

The only really bad time to trim a tree is in the spring when flower buds and new leaves are developing. Trimming a tree while the leaves are expanding disturbs the tree’s growth and causes it a lot of stress. If you see that buds on the tree are beginning to swell, leave it alone until the leaves have grown to their mature size. Then, if you need to trim before fall for safety reasons, it is safe to do so. Otherwise, it is best to wait until the tree is dormant, as trimming when the tree is still active will create a burst of new growth. This new growth is tender and more susceptible to becoming damaged in cold temperatures.

Trimming Techniques

There are different types of trimming techniques that professionals use in order to best address the needs of each tree. Cleaning refers to removing dead, dying, diseased, or poorly attached branches from the crown of a tree. Thinning involves removing selective branches in order to improve the tree’s structure, as well as to allow more air and light circulation. This technique helps to improve the shape of the tree, as well as to help unburden overheavy branches to reduce the risk of breakage. Raising is the removal of branches growing low on the trunk in order to allow room for pedestrians, vehicles, or buildings. Reduction refers to reducing the overall size of a tree through trimming. This is often done when trees are either close to or touching utility lines. This is best achieved by trimming back smaller branches throughout the tree, and is much more effective at maintaining the overall form and structural integrity of the tree than old-fashioned tree topping.

Emergency Trimming

Sometimes storms and strong winds can damage even the healthiest and well-trimmed trees. When a tree becomes damaged, it is important to trim it as soon as possible. Branches that become broken or have scrapes through the bark present an open invitation to disease and insects. Emergency trimming can be done any time of the year with little risk of damage to the tree’s overall health.

Treating the Cut

In the past, homeowners were often advised to paint or seal cuts left after trimming a tree, and many products came on the market for this purpose. These products claim that they must be used in order to sterilize or treat cuts, and while these products are still readily available, they actually do more harm than good. These products actually delay the tree’s healing process. Left alone, the tree will quickly grow a layer of cells over the cut, thus preventing the risk of disease or insect invasion.

No matter what type of trees you have, we are happy to stop by to give you a free estimate to determine your individual needs. Call our office today to make an appointment that best suits your schedule.

Sirococcus Shoot Blight

In 2012, we saw a huge increase in needle blight on spruce trees. Here is the latest information on spruce tree blight:

Sirococcus shoot blight of spruce causes branch tips to turn brown and needles to drop off leaving infected brach tips bare. One year old growth may also turn reddish brown and cast needles. Small black fruiting bodies can be seen on infected shoots. To manage this disease on young trees, apply chlorothalonil in May, when new shoots are one half to two inches long, and repeat the application 3-4 weeks later.

To Fertilize or Not Fertilize Our Trees

Liberty Lawn & Landscape believes it is important for our customers to be updated on the most current information in the landscaping industry. Here is an article written by an accredited arborist, instructor and educator.

To Fertilize or Not Fertilize Our Trees
by the Plant Health Department @ Terry Hughes Tree Service

In the green industry, there is always that question of whether or not it is a good idea to fertilize. I have heard both sides of the story, and both have valid points. I tend to believe that it is always in the best interest of the plant in the current urban settings to do so.

People will say, “The trees in the forest don’t get any fertilizer.” Well, that is true. The trees in a forest or wooded area don’t need the deep root feeding like they would in a housing development. They have the luxury of natural decomposition. This breakdown of natural material will give the plants in that type of setting the minerals and nutrients that they need over a period of time. The problem with the urban setting where our plants and trees are put in the ground is that they lack that decomposition of plant material. Everyone rakes and bags their leaves and grass. Therefore, there is nothing being put back into the soil. Not to mention that the land developers come in and change the grade of the land and only leave the bare clay soil. This is not the best type of surrounding for a newly planted tree as we all know.

That being said, we as arborists should be fertilizing our trees and shrubs to give that plant what it is so lacking in this clay soil we are surrounded by. This brings up another benefit to deep root fertilization by breaking up these compacted clay soil conditions. In doing so, this will also allow air to get to the root system enhancing the vigor of the plant. The main objective in deep root fertilization is the healthy establishment of the plant’s root system.