How to Trim Your Bushes

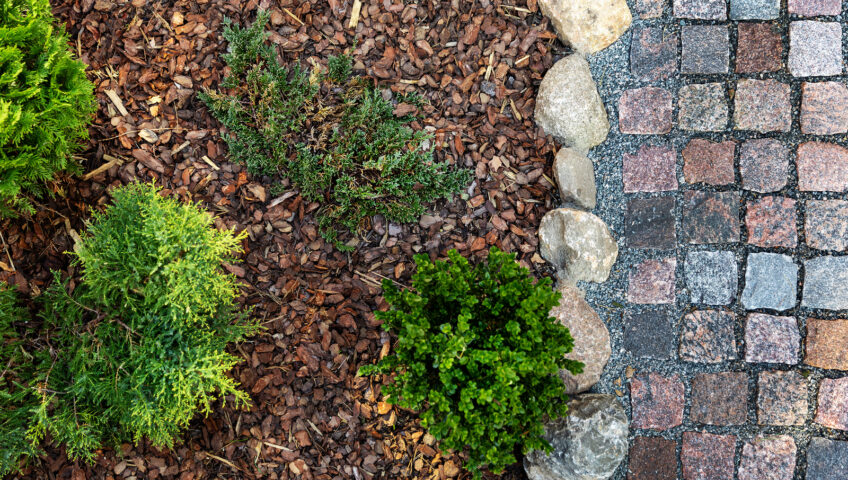
Though perhaps not the most popular types of landscaping plant, bushes, shrubs, and hedges are beautiful plants that add natural beauty and curb appeal to your home. Easy-to-maintain and often vibrant year-round, they make a great addition to accent your lawn, trees, gardens, and hardscapes, such as walks, patios and walls. They can also be great ways to provide a windbreak, privacy screen, or even a living fence around your yard. Keep reading to learn about the types of trimmers you can opt to use, as well as some tips on how to trim bushes yourself.

Types of Trimmers

If your bushes are left to become overgrown, however, they can negatively impact your curb appeal, making your yard look messy and unkempt. But maintaining these types of plants is actually quite simple, thanks to readily available and affordable hedge trimmers. There are three types of hedge trimmers available, depending on your individual needs and preferences:

  • Gas-powered Trimmers

These trimmers have the most powerful engines, and are best for cutting through thicker branches. They also have the advantage of not being tethered by a cord, which makes them a great option for people with large yards. They can be more expensive than other trimmer options, and require you to mix a small amount of oil with the gas in order to keep the engine lubricated.

  • Corded Trimmers

Less expensive in quieter than gas-powered trimmers, corded trimmers are a great option for those with smaller yards and are virtually maintenance-free. You also don’t have to worry about using a pull-start or a choke to get it going each time you use it. They are slightly less powerful, making them better suited to small and medium-sized bushes.

  • Cordless Trimmers

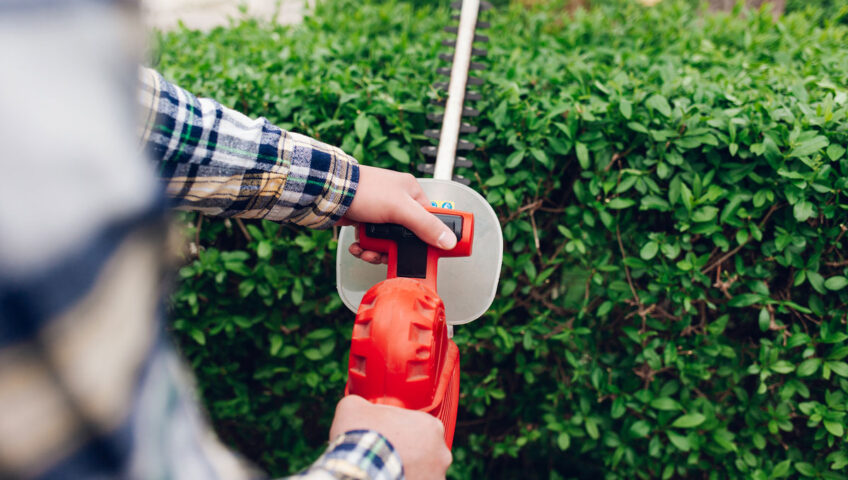
While cordless trimmers have been around for a number of years, it was only recently that, thanks to advancements in battery technology, that they became a popular option for trimming bushes. Much like corded trimmers, they require little maintenance, are easy to start, and are very quiet. While they can be less expensive than gas-powered trimmers, many require you to purchase the battery and charger separately, which can make them more expensive than corded options.

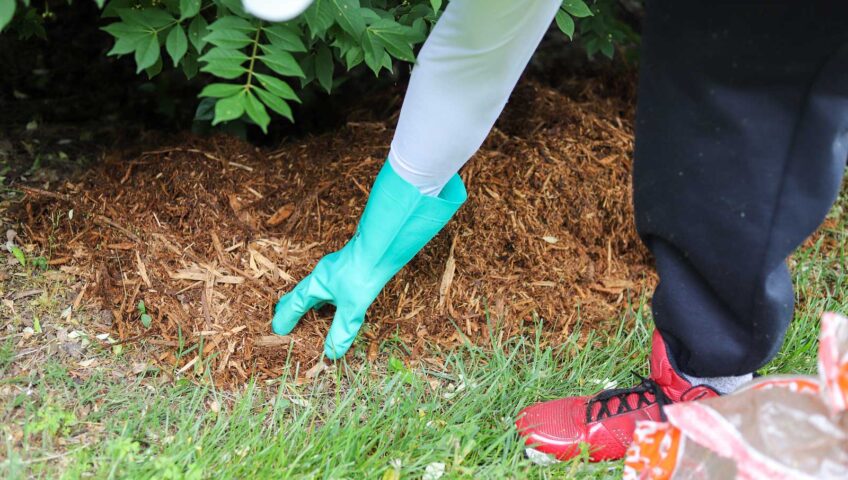
Hedge trimmers are very simple to use, though it is important to be careful as they have sharp blades. Always keep two hands on your trimmer when it is turned on. If you find a branch that is too thick to cut with your trimmers, never try to hold it still with one hand while cutting. Instead, use a pair of hand pruners to ensure you don’t accidentally injure yourself or the bush with your powered trimmers.

Trimming Your Bushes

The number of times you trim your bushes every year depends on the look you’re going for. If you want less formal, more natural-looking bushes, trim them just once or twice a year. For more formal bushes and hedges, you’ll want to trim three to four times per year.

Start trimming your bush from the bottom and work your way up, taking on a little bit off at a time. Avoid trimming the bush into a “V” shape, which discourages light from getting to the bottom branches and root system, and can make them lose their leaves or needles. Instead, aim for a shape that is slightly wider at the bottom, which allows optimal exposure to sunlight and promotes a full, lush bush.

To cut the top flat, hold the blade level with the ground and move from right to left, then left to right. Take only a little bit off at a time, guiding the blade as level as possible. For tall bushes or hedges, you can use stakes with a string tied across them as a guide to get a straight, even cut. Stop as you go to use your hands to remove cut pieces from the bush. It will likely take several passes to get the bush into the shape you want.

Make sure to trim bushes in the early morning or late afternoon to avoid sunburning the freshly cut branches. You should also avoid trimming bushes in early spring when birds are nesting. When you’re done trimming the bush, you should go through it by hand with your pruning shears to find and remove any dead or diseased branches inside of the plant.

If you aren’t confident trimming your own bushes, Liberty Lawn is here to help. We offer all kinds of yard services, including bush trimming, to keep your yard looking its best all season long. Give us a call today to schedule a free consultation!

How to Fertilize Your Lawn

All plants need more than just water and sunlight to thrive, and grass is no exception. Applying fertilizer to your lawn feeds it necessary nutrients that it needs to grow thick and lush. Maintaining a thick, lush lawn helps prevent weeds from sprouting and moving in, allows your lawn to fight off disease, and helps roots retain more water during warm summer days.

Most fertilizers are only effective for 6 to 8 weeks, so maintaining a regular fertilization schedule is essential in keeping your lawn healthy all season long. Here are the steps you should take to fertilize your lawn:

  1. Water your lawn. A day or two before you fertilize your lawn, give it a good watering. Ensuring your soil is damp, but not soaking wet, helps the soil absorb the fertilizer.
  2. Pick the best spreader for your lawn. There are a few different types of spreaders, and you’ll want to be sure you have the correct one to make the application quick and easy. For small lawns, a handheld spreader can work just fine, whereas people with bigger lawns will benefit from a push-type spreader. Make sure to adjust the spreader settings. Each fertilizer product has a spreader setting on the package to ensure correct coverage.
  3. Start by applying grass fertilizer around the perimeter. It is always best to start applying fertilizer around the perimeter of your grass, as it is the easiest area to accidentally miss spots. Simply walk around the entire perimeter, ensuring you move steadily for an even application.
  4. Fill in the middle. Similar to a mowing pattern, feed your lawn by walking back and forth in straight lines, making sure to overlap slightly with each pass.
  5. Properly store any remaining product. Once you’ve finished fertilizing your lawn, return any unused product to the bag and store it for future use. Be sure to keep it in a cool, dry place away from pets and children.

We hope that this article has helped you to learn about the benefits of fertilizing your lawn. If you aren’t certain which fertilizer is best for your individual needs, or aren’t able to fertilize on a regular schedule, Liberty Lawn is here to help. We offer all kinds of yard services, including lawn fertilization, to keep your yard healthy and looking good all season long. Give us a call today to schedule a free consultation!

7 Benefits of Using Mulch

When it comes to quick, easy, and inexpensive ways to spruce up your curb appeal and benefit your plants, you can’t beat mulching. Mulch comes in many different forms, from wood chips and pine needles, to recycled tires and river rocks. But did you know that mulching has many different benefits beyond just looking nice? Here are 7 different benefits that applying mulch can have for your yard.

  1. Controls Weeds

Using mulch helps to control weeds in your yard by taking up open spaces. The mulch acts as a barrier, preventing sunlight from reaching the ground and causing weed seeds to germinate. It is a great way to help prevent weeds in garden beds.

  1. Retains Moisture

Mulch helps your soil to retain moisture by absorbing water and limiting evaporation. This means that, during hot summer months or periods of drought, you will have to use less water to keep your plants healthy. This not only ensure happy plants, but also helps cut down on your water bill.

  1. Prevents Soil Erosion

Mulching not only helps to keep water trapped in the soil, it also prevents rain water from washing away your soil. Mulch helps prevent erosion creating a barrier on top of the solid that breaks the fall of the water, and lessens the force when the water impacts the ground.

  1. Maintains Soil Nutrients

Not only does mulch help keep water in the soil, it also helps to keep nutrients in the soil. In addition, if you choose an organic mulch such as wood chips or pine needles, as they slowly decompose they will release additional nutrients directly into your soil.

  1. Controls Pests

Using certain types of mulch, such as cedar bark, can deter certain pests due to the fact that the cedar bark has natural oils that act as insect repellent. To reap the full benefits, be sure to find a mulch that is very fragrant, as it will have the greatest effect on insects. Some mulches, however, can encourage insects to flock to your garden, and even your house if your mulch touches your home. Be sure to research which type of mulch will best suit your needs.

  1. Encourages Earthworms to Move In

Using organic material for mulching can encourage earthworms to occupy your garden soil. Earthworms like the damp, dark area underneath mulch, and they make a great addition to your garden because earthworms help improve soil structure and nutrient cycling.

  1. Polishes up Your Garden

Mulch can give a garden a finished look by filling in the empty spaces while being one of the easiest fillers to maintain. Grass, groundcovers, and other fillers may take extensive care, such as mowing and watering, as well as competing for resources with your garden plants. Mulch is easy to care for and never competes with your other plants.

We hope that this article has helped you to learn about the benefits of mulching in areas around your yard. If you aren’t certain which mulch is best for your individual needs, Liberty Lawn is here to help. We offer all kinds of yard services, including mulching, to keep your yard healthy and looking good all season long. Give us a call today to schedule a free consultation!


Can I Overseed My Lawn in Late Spring?

For many homeowners, achieving a thick, lush lawn in a battle they fight each and every year. From winter damage to summer droughts, there are many things that can get in the way of achieving your dream lawn. If your lawn is looking weak, or is thin in some areas, there is a solution beyond just fertilizing: overseeding. Many people don’t realize that overseeding is a great solution to keeping your lawn healthy, even after your grass has established itself. Read on to learn about how overseeding helps your lawn, the best time of the year you can do it, and how you can tackle this task yourself.

Why Should I Overseed My Lawn?

Overseeding simply refers to applying new grass seeds over your existing lawn. Unlike reseeding, it doesn’t require removing any of your existing growth. Instead, overseeding works to fill in bare spots, improve the thickness of the lawn, and enhance its color. In addition, overseeding newer varieties of grass into an older lawn can improve its ability to withstand insects, disease, drought, and heavy traffic.

When Should I Overseed My Lawn?

There are two ideal times of the year to overseed your lawn – fall and spring.

  • Fall is the best time of year to overseed. This is because your soil is still warm, which means that the grass seeds will germinate faster. And because there are fewer weeds growing this time of the year, your grass will have fewer competitors vying for their water, sunlight, and nutrients.
  • Overseeding in spring is still a good option. The key is to wait until the soil warms up enough that the seeds can germinate before they’re eaten by your local wildlife. You’ll also want to be sure you overseed before the hot summer months, which can kill seeds and new sprouts if there isn’t enough rain to keep them moist.

How to Overseed a Lawn

In order to give your need grass seeds the best start, you should follow these steps:

  • Choose a Grass Seed

Which type of grass seed you choose depends on your existing grass type. There are many options to choose from, including warm and cool season grasses, as well as ones that are aimed at helping to thicken thin lawns. If you aren’t sure of the best grass for your area, your neighborhood garden or home improvement center can help you choose the right seed.

  • Mow Low

Before overseeding your lawn, cut your grass shorter than normal and be sure to bag the clippings. Next, you should rake the lawn to help loosen the top layer of soil and remove any dead grass and debris. This helps to give the grass seed easy access to the soil so it can root quickly after germinating.

  • Improve the Soil

Before spreading you seend, it’s a good idea to rake in a thin layer of compost over your lawn to help the seed settle in, especially in areas where grass is thin or completely gone. Aim for about a quarter of an inch of compost so that you don’t kill your existing grass.

  • Spread the Seed

Spreading the seed is the easiest part of the overseeding process. Simply fill up your spreader, adjust the setting according to the label directions, and apply. You can choose either a hand-held spreader, or a push-type model which is very handy for large yards.

  • Feed and Water

To give your new grass seedlings the nutrients they need to grow strong, apply a quality fertilizer after spreading your seed. Then, be sure to keep the soil consistently moist by lightly watering once or twice a day until the seedlings are the same height as the rest of your lawn.

We hope that this information has helped you to learn about overseeding your lawn. If this isn’t a job you’d like to tackle yourself, Liberty Lawn is here to help. We offer all kinds of yard services, including overseeding and fertilization, to keep your lawn lush and green all season long. Give us a call today to schedule a free consultation!

The Best Time to Fertilize Your Lawn

One of the easiest ways for you to ensure your lawn grows thick and green this year is to fertilize and reseed. A well-fed lawn is healthier, and has a stronger root system that can withstand heat, drought, cold snaps, foot traffic, mowing, and other stressful events. While feeding your lawn once a year is adequate, having a schedule in place to fertilize your lawn four times per year is the best option to keep it healthy through the growing season, and ensure it comes back just as strong each spring.

When to Fertilize Your Lawn

When it comes to using fertilizer on your lawn, timing is everything. Making sure your lawn gets fertilized at the right time not only helps to boost its growing potential, it also ensures you don’t apply it when it isn’t going to be as effective.

  • Early Spring

When your lawn begins to wake up in the spring, its store of nutrients is typically completely gone. Fertilizing in early spring helps to immediately feed your grass’ roots, and gets the spring growing season off to a great start. Apply early spring lawn fertilizer once between February and April, as soon as your grass greens up and begins growing. This is usually best done around the same time that your lawn needs its first mow of the season.

  • Late Spring

By late spring, your lawn has likely used up all of its stored energy from its last feed and is in need of another boost. Apply late spring fertilizer once between April and June, about six to eight weeks after you fed it in early spring. This will keep your lawn well-fed into the hot summer months.

  • Summer

The summer months bring heat, drought, foot traffic from kids and parties, as well as a host of insects. All of this can be tough on grass, and if it isn’t fertilized it can turn brown and patchy. Apply summer fertilizer once between June and August, about six to eight weeks after you fed it in late spring, to keep your lawn going strong through the heat.

  • Fall

It may seem odd to fertilize your lawn right before it goes into hibernation, but it is in fact a very important time to fertilize. Your lawn needs nutrients to recover from many summer damage, as well as to get ready for hibernation. Fall fertilization helps to strengthen roots to keep your lawn from getting damaged through the winter. Apply fall fertilizer once between August and November, right before you expect your first freeze, which should be about six to eight months after you fed it in summer.

We hope that this information has helped to to learn about when you should be fertilizing your lawn. If this isn’t a job you’d like to tackle yourself, or if you’re worried you’ll forget about it, Liberty Lawn is here to help. We offer all kinds of yard services, including fertilization, to keep your lawn lush and green all season long. Give us a call today to schedule a free consultation!

Dethatching your Lawn to Maximize Growth

Most people know that having a healthy lawn requires good soil, the right amount of water, and plenty of sunlight. But did you also know that dethatching can be an equally important part of your yearly lawn care routine? Not all lawns will require dethatching, but it is important to be able to tell when it does need it, and how to do it properly.

What is Thatch?

Everytime you mow your lawn, small bits and pieces of grass get left behind to die and settle on top of your soil. This is thatch. A small amount is actually good for your soil, as it breaks down and adds nutrients that the grass will feed off of, and also helps to hold in moisture. Anything less than half an inch is considered safe and beneficial for your lawn. Too much thatch, however, can lead to problems as it prevents water and air from reaching the down into the soil. If your grass isn’t growing as well as it should despite proper care, there is a very good chance that thatch is to blame. An easy way to tell if you have too much thatch is to touch it; if the thatch is too thick, your lawn will feel spongy and it will be difficult to get your finger all the way down to the soil.

How to Dethatch

Before you work on dethatching your lawn, you should first trim it to half its normal height. Make sure to mark and shallow sprinkler heads or water lines if using powered dethatching equipment. There are a number of different ways that you can go about dethatching your lawn. These include:

  • Manual dethatching with special rakes.

These heavy, short-tined rakes have curved blades that are designed to dig into your lawn and pull up thatch as you rake. Dethatching rakes are good for light thatch and general thatch maintenance on small lawn areas.

  • Power rakes.

These mower-like devices have rotating, rake-like tines that dig into thatch at the soil level and pull it up. Power rakes work well for lawns with thinner thatch layers and grass that can withstand intense raking.

  • Vertical mowers.

Also called verticutters, these mowers have vertical blades that slice down through the thatch layer and into soil, pulling thatch—and often grass roots—to the surface as they go. Their blades adjust to control how much thatch you remove at once. Verticutters are best for thick thatch layers on lawns that have been neglected for an extended period of time.

You can purchase a manual dethatching rake at most home and garden stores. For power rakes and vertical mowers, you will need to find a local equipment rental store. These stores often keep power rakes and vertical mowers on hand, especially during the dethatching season. Whatever option you choose, when you are finished make sure to clean up all of the debris and water your lawn thoroughly and consider fertilizing to help any damaged areas recover.

The Best Time to Dethatch

The best time to dethatch your lawn depends on the type of grass you have, as it should be done when the grass is actively growing and the soil is moderately moist. For cool season grasses, this means early spring or early fall. For warm-season grasses, late spring through early summer.

If you aren’t ready to tackle this job yourself, or if your thatch is extremely thick, consider calling in a professional instead. We offer dethatching services to suit any yard size, and always clean up all debris. Give us a call today to schedule a free consultation!

Spring Yard Cleanup Checklist

Now that temperatures are finally rising and spring is in the air, it’s time to consider completing some spring cleaning tasks for your yard. Yards that are left unkempt not only look unsightly, but they also aren’t able to maximize their growing potential throughout the season. We’ve come up with a spring yard cleanup checklist to help you get your yard nice and tidy in time for spring and summer outdoor activities.

  • Check for lawn damage and prep for reseeding.

While your grass can withstand cold winter temperatures while hibernating, sometimes you’ll end up with damage from traffic, road salt, or disease. Prepare to reseed damaged areas by removing dead areas with a heavy square metal rake. Then, apply a ¼ layer of compost to help give seeds a jump-start when it is time for planting.

  • Prune dead and damaged branches on shrubs and trees.

Any branches that have been damaged by winter weather should be trimmed back to keep your shrubs and trees happy and healthy throughout the growing season. If you have hedges, use hand shears to shape them as electric shears can cause damage that prevent the hedge from being able to grow a nice thick outer layer. Prune summer-flowering shrubs, such as Rose of Sharon, before buds swell, but wait to prune spring bloomers, like forsythia, until after they flower.

  • Cut back and divide your perennial plants.

To start, prune flowering perennials to a height of 4 to 5 inches and ornamental grasses to 2 to 3 inches. This helps to encourage vigorous new growth. As soon as the ground has thawed, it is safe to dig up perennials to thin your beds or transplant them to other areas of your yard. Make sure to leave at least three stems per clump. Cut back any rose canes that have been damaged to about 1 inch below any blackened areas.

  • Clean up fallen leaves and debris.

All leaves, dead foliage, or remaining dead annuals should be cleaned up and removed from your yard. Now is also a good time to remove any mulch that you plan to replace, which also allows you to see heaved plants that need to be tamped back into the ground.

  • Start your compost pile.

If you choose to compost your yard waste, now is the time to start your new compost pile with the debris and old mulch that you’ve collected from around your yard. Shred leaves and chip branches over ½ inch in diameter if you can, or add a bagged compost starter to give the pile a boost. Make sure to keep it evenly damp, and aerate it with a pitchfork every two weeks.

  • Tidy up paths and patios.

If any decorative gravel has moved out of its boundaries during the winter, now is the time to rake it back to where it belongs. Order more gravel to fill any areas that are thin or bare. Remove any pavers that have been heaved by winter freezes, tamp down and add base material as needed to get it back to level. If you have flagstones, refill joints with new sand or stone dust as needed.

  • Replace or repaint wood fences and trellises.

Start by checking that all posts are still securely in the ground, then remove any badly damaged pickets, boards, or lattices. Next, scrape off any loose old paint and sand smooth for the best results. Install new wood and perform any required patching with wood epoxy. Once temperatures are above 50 degrees, you can apply your new paint.

We hope this checklist has helped inspire you to get your yard back in shape this spring. If you simply don’t have the time or the patience to do your spring yard cleanup, we offer many different services to meet your needs. Give us a call to set up a free estimate today!

The Benefits of Bed Edging

It’s no secret that a well-designed yard is not only visually appealing, but is also easier to maintain throughout the year. One of the easiest and most affordable ways to help add appeal to your yard is also perhaps one of the most frequently overlooked: bed edging.

Bed edging is a permanent divider between your garden beds and your lawn, walking paths, or driveway. There are many different material options available, the most popular being low-profile aluminum or plastic strips, natural stone, or cast concrete pavers. All of these different options means that you can choose the material that best compliments your home or yard.

The benefits of bed edging include:

  • Clean and Well Defined Borders

Edging helps to provide a clear and well-defined border between the different areas of your yard. And because there are many decorative options available, it can actually contribute to the overall curb appeal of your home.

  • Weed Growth Prevention

Edging helps to create a defined break between areas of your yard, because it adds a trench between your bed and your lawn. This means that weeds are much less likely to spread from the lawn to the natural area, or from the natural area to the lawn.

  • Easier Edge Maintenance

By leaving a slight lip (approximately 1 inch) on the lawn side, trimming your grass is quick and simple because it allows room for your mower to reach all of the grass.

  • Less Unwanted Growth

Bed edging not only helps prevent the spread of weeds, it also helps to prevent other plants from growing where they aren’t wanted. This includes both grass and decorative plants, which can overgrow into unwanted areas during the summer.

  • Mulch Stays in Place Even after Heavy Rains

Your mulch does the job it was intended to do, hold moisture and block weeds, much better because it stays in place. Even after inches and inches of rain, the trench at the edge provides a natural drain and helps contain the mulch. This not only saves you from having to clean up or rearrange your mulch every time it rains, but it also saves you money on replacement mulch.

If you are considering adding bed edging to your lawn and aren’t sure of where to start, we are happy to help you. From design to material choices to installation, we can help you with all aspects of the process. Give us a call today to set up an appointment for your initial consultation!

Rocks vs. Mulch – Which is Better in Flower Beds & Around Trees?

Whether you are considering adding mulch to your flower beds or around your trees, there are many different points to consider. Which looks better? Which benefits my plants more? Which is lower maintenance? Let us help you answer some of these questions by listing the pros and cons of the two most popular mulch options: organic mulch and river rocks.

Organic Mulch

Pros

  • Better Growth: Mulch can nearly double how fast trees and plants grow, according to studies.
  • Less Water: Mulch reduces water evaporation, so you spend less time and money watering!
  • More Nutrients: As mulch breaks down, it adds nutrients that plants need to thrive.
  • Fewer Weeds: Mulch stops weed seeds from sprouting, so you may see 50 percent fewer weeds.
  • Just the Right Temperature: Mulch keeps plants warm in the winter and cool in the summer.
  • Reduce Compaction and Erosion: Mulch reduces soil erosion by up to 85 percent. Plus, people are less likely to walk on mulch, so there’s less soil compaction.

Cons

  • Annual Replacement: Depending on your mulch type, you’ll have to replace it every one to four years. So, it’s a recurring cost and time expense.
  • Too much of a Good Thing: Adding a layer of mulch more than 2-3 inches of mulch stresses out plants.
  • Too Early = Late Blooms: Mulching too early may slow how quickly the ground warms, which means you could see blooms a bit later than normal.
  • Too Late = Weeds: Mulch stops weeds from germinating. If you mulch too late, it may not stop them as much.
  • Check for Seeds: Some organic mulches, like pine bark and hay, may have weed seeds in it.

River Rocks

Pros

  • Low Maintenance: You almost never need to replace them.
  • Lower Cost: Because they’re longer lasting, it is generally less expensive to mulch with rocks.
  • Fire-Proof: If you live in an area with wildfires, rocks could be better since they’re nonflammable.
  • Weeds Be Gone: Rocks can keep weeds away longer.
  • Wind-Resistant: Heavy rocks are great at preventing soil erosion in windy areas.
  • Perfect for Rock and Cacti Gardens: Rocks are just right for these garden spaces!

Cons

  • Too Hot: Rocks, especially lighter ones, raise the soil temperature, leading to stressed, thirsty plants.
  • No Benefit to Plants: Rocks don’t aid plant growth or soil health.
  • Messy pH: Most trees prefer acidic soil, but rocks create alkaline soil, which can hurt trees.
  • Return of the Weeds: Wind will eventually blow soil between rocks, creating a spot for weeds to grow.
  • No Good for Pruning: Rocks can prohibit rejuvenation pruning, creating unwieldy shrubs.
  • Remove by Hand: If you want to remove stones, you must do it manually, which can be tedious!

Our Verdict

Organic mulch is much better overall for the health of your flower beds and trees. Stone, however, is better than no mulch at all if you absolutely must have rock. Still unsure of what you’d like in your landscaping? Give us a call or send an email to get our expert opinion.

LibertyLawn@gmail.com / 402.423.0061

3810 Cornhusker Hwy, Lincoln, NE 68504 / PO Box 29442. Lincoln, NE 68529

Should You Treat or Remove Your Ash Tree with EAB?

The Midwest currently faces a very real threat to a large portion of its public and private trees. An invasive and exotic pest known as Emerald Ash Borer (EAB) has already infested many ash trees, and will eventually infest all ash trees if it is left untreated. Initially discovered in the U.S. in 2002 near Detroit, Michigan, EAB is a very serious pest that has a track record of killing all untreated ash trees in infested cities.

EAB is now considered the most destructive forest pest ever seen in North America. It has been killing ash trees in cities for over a decade, and it is now widely accepted this pest will kill all untreated ash trees, likely costing cities, states, and homeowners billions of dollars in the process.

When to Remove Your Ash Trees

The decision whether or not to remove an infected ash tree is up to you. While there are a number of effective treatment options, they typically last only 1-2 years and need to be repeated for the life of the tree. Please remember that treatments are not effective if more than 30% of the tree canopy is already dead.

Removing a beloved tree is a tough choice to face. We want to help you make an informed decision that is best for you and the health of your trees. Our certified arborists will guide you through a process that considers your budget, the value of the tree to your property, and respects the sentimental nature of your trees.

When to Treat Your Ash Trees

When it comes to EAB, there is one big question for cities and homeowners alike: “Should I treat my trees to protect them, or should I remove them so dead trees don’t threaten other people or property?” For homeowners, there is a short list of steps to consider:

  • Check your property to see if you have ash trees. Check your trees now before you begin to see dieback.
  • Make some tough decisions about whether to remove the tree and replant, or treat the tree and protect it. A certified arborist can be a big help in quickly assessing the health of the ash and help you make a decision. Doing nothing will only delay the problem and will likely result in the tree’s death and possible injury or damage to nearby property.
  • Realize that most treatments require re-application at least every two years for the life of the ash tree. Ask yourself if you’re willing to keep up treatments if you decide to keep the tree. If not, it is recommended that the tree be removed.

Please contact our licensed and certified arborists at Liberty Lawn & Landscape, Inc. for your free Emerald Ash Borer Evaluation. We can help you assess your ash trees so that you can make the decision whether to treat or remove your ash trees. In making either decision, you can help be a part of the nationwide effort to keep EAB from removing ash trees from our communities.

LibertyLawn@gmail.com / 402.423.0061

3810 Cornhusker Hwy, Lincoln, NE 68504 / PO Box 29442. Lincoln, NE 68529